This post was originally published on this site.
The first time I saw an ultrasonic cleaning tank was about twenty years ago at the Smithsonian Institution’s historic aircraft restoration facility in Silver Hill, Maryland. The restoration technicians had several of them. These tanks were big enough to fit a few fully assembled Browning machine guns. Ironically, that’s what was in them the day I visited. Those old Brownings were seized up with decades of rust and dirt that defied manual attempts to disassemble them. Yet, after a spell in the tank, they came apart with ease. I was impressed.
Back then, ultrasonic cleaners were prohibitively expensive. Today, prices have come down so much that quality table-top models like the stainless steel Lyman Power Pro 3L (three liter) and 6L (six liter) are affordable. I found both on Brownells for $165 and $203 respectively.
Advertisement — Continue Reading Below
These new Lyman cleaners look like high end kitchen appliances, So much so, I was able to set one up on the counter top with the drain hose discreetly coiled behind it without drying criticism, or even comment, from my beloved wife.
Ultrasonic, Ultra-Clean
Ultrasonic cleaners are the “Swiss Army knife” of cleaners. These devices use one or more transducers to continuously pulse high frequency sound waves through a metal tank of liquid solution. These waves generate tiny bubbles that gently scour all surfaces of anything submerged in an ultrasonic tank. The cleaning action is accelerated by increasing the temperature and selecting a chemical solution suited to the specific job.
Advertisement — Continue Reading Below
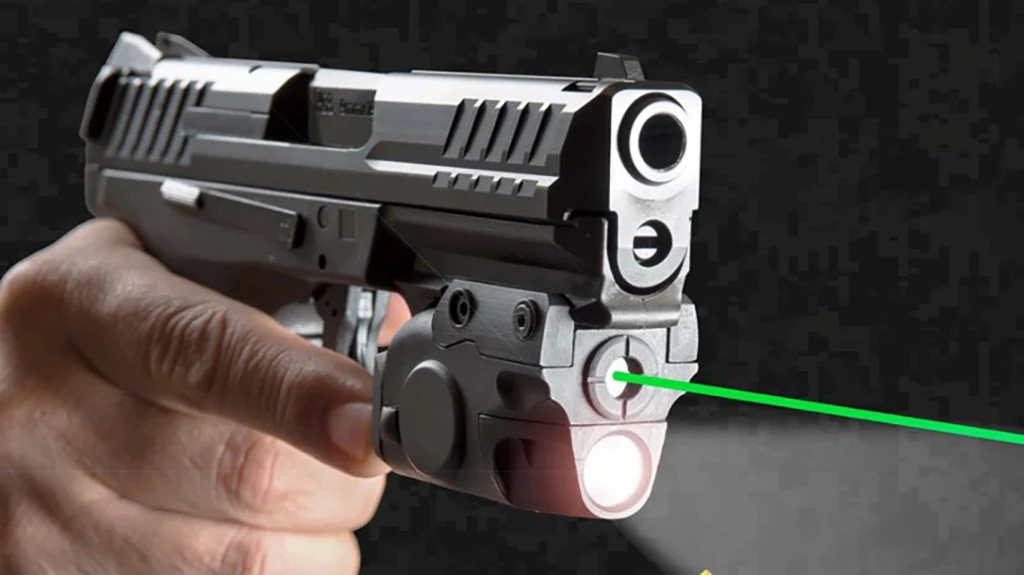
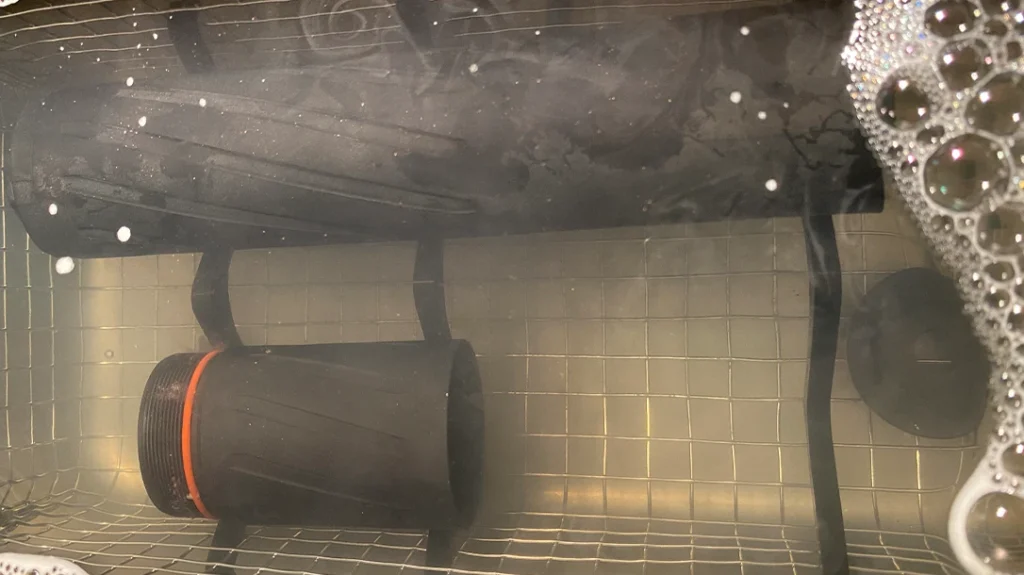
When it comes to firearms, ultrasonic cleaners happen to be great for cleaning all the carbon and lead residue out of certain parts and devices, like suppressors. If the object to be cleaned can stand a hot bath, and especially if it’s complex or delicate with lots of little nooks and crevices, ultrasonic cleaning can be the most efficient method. Air pockets within a submerged object will prevent the bubbles from doing their work. It’s why a degree of disassembly is advisable before cleaning.
Ultrasonic cleaners are excellent for cleaning and degreasing gun parts before bluing. Submerging the parts in a cleaner for a 30 minute cycle, followed by a tap-water rinse and wipe down, is much easier and more thorough than the traditional scrubbing with various soaps and solvent and dunking in rinsing baths.
While you can accomplish a great deal with hot tap water and Dawn liquid soap or various concentrations of Simple Green cleaner, specialized ultrasonic solutions are available. Lyman offers a wide range to tackle tasks like cleaning brass cartridge cases, cleaning steel/stainless-steel and for rust removal, for example.
Advertisement — Continue Reading Below
Saving Ancient Parts
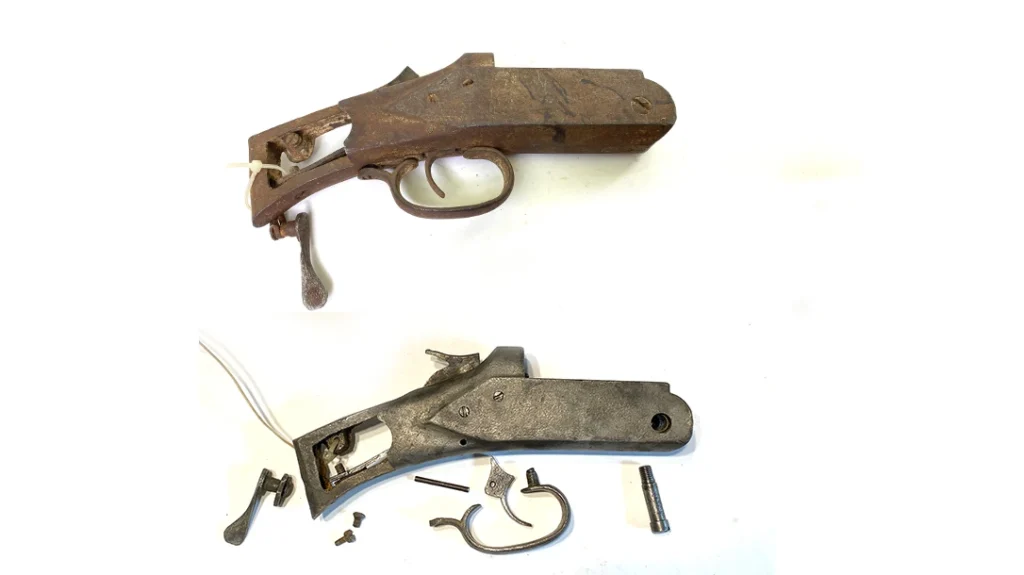
Using the Lyman Power Pro 6L, hot water, dish soap and time, I was able to free up the jammed elevation slide on a Mauser rear sight. This part was frozen with hardened grease dirt and rust. Similarly, I also removed the rusted in screws and pins from a 120 year old cast-iron shotgun receiver. On the stuck screws, I noticed that each treatment in the ultrasonic tank allowed the little bubbles to penetrate deeper into the screw threads and scour away the detritus that was clogging them. It took 24 hours of treatment to get it apart without damage. With a specialty solution intended for removing rust from steel, I expect it would have gone a lot faster.
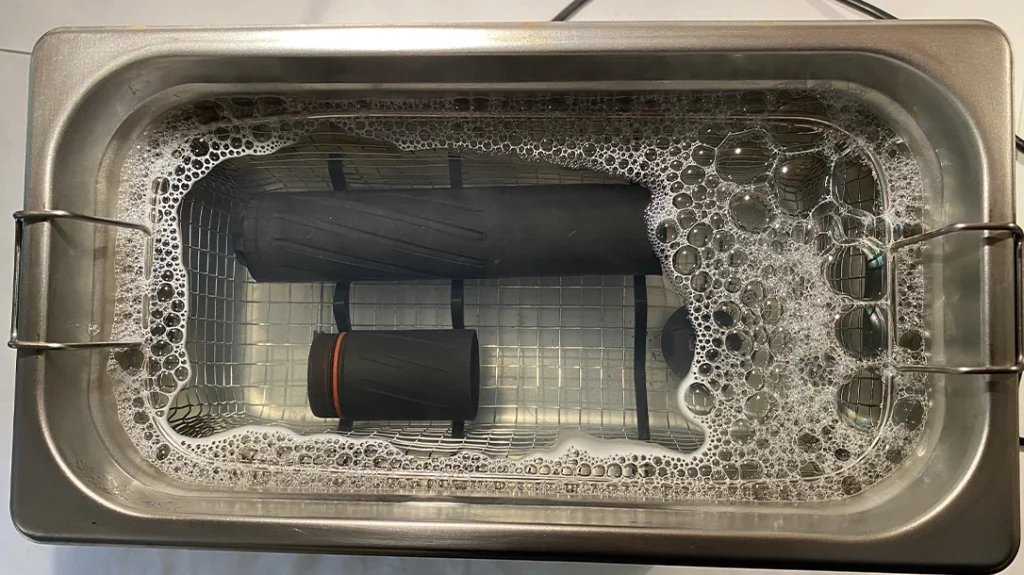
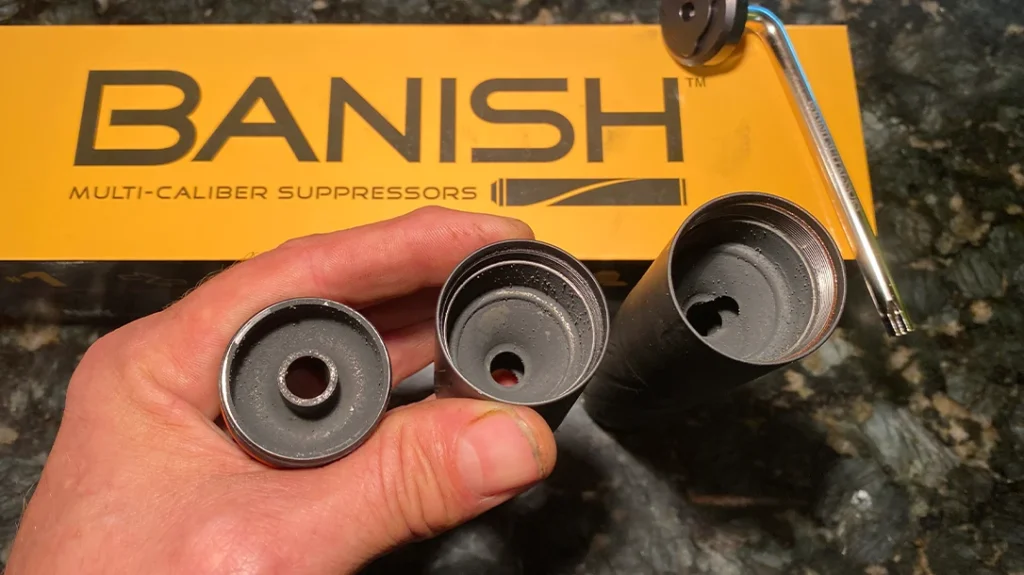
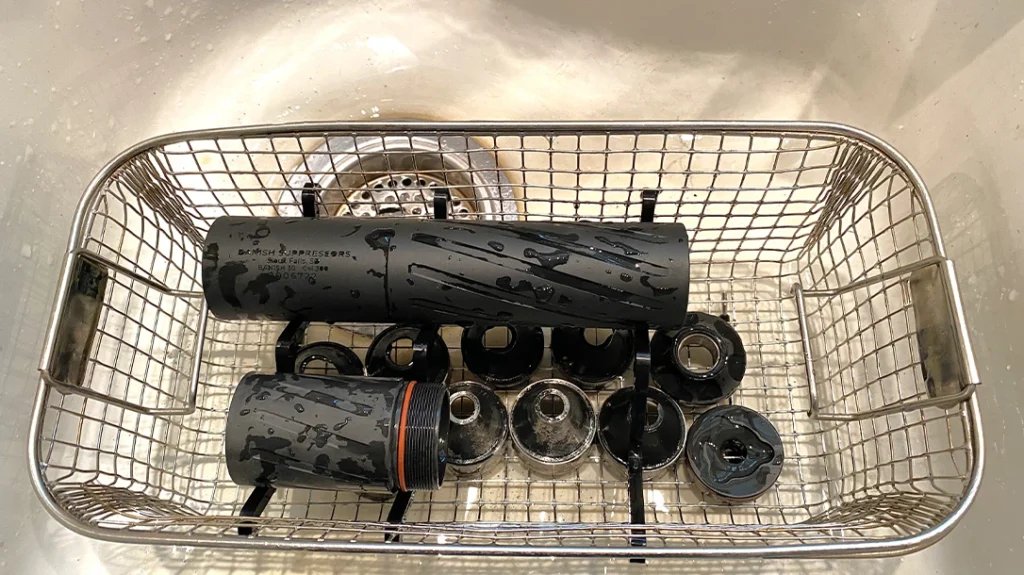
You can also see how I took advantage to clean my Banish suppressor throughout the pictures in this article.
Advertisement — Continue Reading Below
Breaking Down Both Ultrasonic Lyman Power Pro Models
The larger Lyman Power Pro 6L has a stainless steel wire parts basket that measures 11.8×5.9x 5.9 inches. Its basket is 2 inches longer and deeper than the 3L model. I prefer the larger unit because it is well sized for large suppressors and long barrel handguns.
Both units are made by Raytech Industries. They run on household current (AC 110V -120V) and clean at a frequency of 40,000 Hertz with three different cycle settings (5, 10 and 30 minutes). The Lymans also have a self-regulating heater that can be adjusted up to 175℉. They’re also equipped with a ballcock drain valve and drain hose for easy tank draining/cleaning. Finally, both include removable plastic “V” hangers for suspending long items lengthwise in the parts basket.
Advertisement — Continue Reading Below
Lyman Power Pro Ultrasonic units appear to frighten cats when the transducers are running. Mr. Whiskers, daughter’s pet, hid in the downstairs library whenever the Lyman Power Pro was running a cycle. Once I realized this, I moved it out into the shop so as not to torment the poor creature. I hope cleaner might have the same effect on mice.
Ultrasonic Cleaning Tips
- Never turn on the transducer with a dry tank. That will destroy the transducer. Keep the unit switched off and unplugged when not in use, or keep it filled with solution at all times.
- Always shut off the tank heater before draining the tank. Operating the heater with the tank dry will burn out the heater.
- Always use the parts basket and never place the basket or any other object on the bottom of the tank. An object on the bottom of the tank can reflect the vibrations back into the transducer and destroy it.
- Always fill the tank to the top of the basket. The cleaner is optimized to work with a specific volume of solution.
- Keep the lid on when the unit is in operation to minimize evaporative loss of solution and save wear and tear on the automatic tank heater.
- A clean solution and tank work more efficiently. Change the cleaning solution when it becomes contaminated with suspended particles. Clean sediment from the bottom of the tank.
- De-gas freshly changed solution by running the unit for 5-10 minutes before adding parts for cleaning.
- Flammable solvents, bleach, and strong acids or bases should not be used as cleaning solutions in your ultrasonic tank.
- Before you put a solution in the tank, ask yourself if it’s a good idea for that substance to get hot, and what will happen if you breathe in the vapors.
- When cleaning parts with stubborn deposits like suppressor baffles, turning parts over and shifting them from the center to the edge of the basket between cleaning cycles will balance the cleaning action. Usually, the downward facing side of the part will be cleaned faster than the upward facing side. Parts toward the center of the basket get cleaned faster than parts on the edges.
Advertisement — Continue Reading Below
WHY OUR ARTICLES/REVIEWS DO NOT HAVE AFFILIATE LINKS
Affiliate links create a financial incentive for writers to promote certain products, which can lead to biased recommendations. This blurs the line between genuine advice and marketing, reducing trust in the content.
The post Secret Behind Ultrasonic Cleaning… Bubbles appeared first on Athlon Outdoors Exclusive Firearm Updates, Reviews & News.